
It seems like every time I pick up a magazine or look on the internet there is an article about adding probiotic foods to your diet. Besides the “normal” items you read about like yogurt or sauerkraut, kombucha, a fermented tea, has become a big part of the conversation. It is amazing how easy it has become to find this naturally carbonated, fermented beverage filled with amino acids, probiotics and a spectrum of B vitamins. In fact, the other day, I even saw some on the self at Target! But what is kombucha and why are so many people talking about it?
Kombucha’s origins can be traced all the way back to the Chinese around 220 BC. From there, it spread to Tibet and into Russia where talk of the “miracle fungus” drink began to appear. Over the years, it continued to spread, eventually, appearing in the US in the Sixties. Since that time, it has grown in popularity.
Kombucha is amazingly easy to make. Black or green tea is combined with filtered water, sugar and a scoby (a symbiotic culture of bacteria and yeast) and then left to ferment on the kitchen counter. After 7-10 days of fermentation, you are ready to bottle your own probiotic drink. It has the effervescence of a soda but without all the sugar and calories. (Sugar is used to brew kombucha. However, most of the sugar is consumed in the fermentation process.) Kombucha is easily and inexpensively produced at home using either the continuous brewing or single batch brewing method.
I have to admit. I was a little nervous to begin producing my own kombucha. However, with a single bottle of commercial kombucha ringing in around $3.99, my daily habit was getting too expensive for my budget. As I started to research at-home production, I found the Kombucha Kamp website. This website is a treasure trove of information about kombucha brewing. Here I could buy my scoby, get my starter liquid and find the answers to all my questions.
-

- Starting Scoby.
-
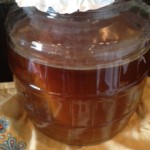
- Scoby forming at top of brewing jar.
-
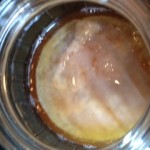
- Growing Scoby
I was so excited when my scoby arrived and was even more excited when I realized how easy it would be to start producing my own kombucha. Kombucha Kamp’s directions are straight forward and are the ones I continue to use today.
Since producing my first batch of kombucha, I have produced hundreds of bottles. The best part is I no longer have to spend $3.99 a day to support my addiction.
Directions as Taken From Kombucha Kamp
Supplies Needed
- tea kettle or large pot
- 1 gallon glass container (no metal or crystal)
- 3 quarts of purified water (no chlorine)
- 1 cup of sugar
- 4-5 tea bags or 4-5 tsp of loose leaf tea
- 1-2 cups of starter liquid (non-flavored kombucha from previous batch or included with your scoby purchase)
- Scoby (obtain from kombucha making friend or purchase- I bought mine from Kombucha Kamp on the internet and it included the starter liquid)
- Tightly woven cloth and rubber band (no cheese cloth because weave is too loose and fruit flies will get in)
Steps
- Heat 4 cups of purified water in tea pot or large pot.
- As water starts to boil, turn off heat and let cool 1-2 minutes, then add to your brewing vessel. Make sure your vessel isn’t too cold to prevent it from cracking.
- Add 4-5 tea bags (green, black or a combo) and steep for 5-10 minutes.
- Remove the tea bags and stir in 1 cup of sugar until dissolved.
- Add 2 cups of purified water, lowering the temperature of the water. It needs to be no warmer than body temperature or it can kill the scoby.
- Add your starter liquid.
- Add scoby.
- Cover container with tightly woven cloth and seal with a rubber band. (I used two layers of coffee filters held with a rubber band.)
- Place container in dark, warm, ventilated area for 7-21 days. Try to disturb as little as possible during this time.
- After 7 days, gently insert straw under the scoby to taste your brew. When it has the right balance of sweet and sour, it is time for bottling. (This is personal preference.)
- With clean hands, remove the scobies and place in clean bowl.
- Pour 2 cups of brew over the scobies to use as starter liquid for next batch. Cover with cloth and set aside for next brew.
- Use clean glass bottles with tight fitting lids. (I reused bottles from store bought kombucha.) Metal lids are not ok.
- If flavoring the brew, put juice, fruit or flowers in the bottles.
- Insert funnel in the bottle and ladle or pour brew into the bottle. Leave some room at top for secondary fermentation.
- Repeat with remaining bottles. Screw on the lids and allow to sit for 1-3 days on the counter, burping the bottles to release carbonation as needed.
- Move bottles to fridge as they reach desired carbonation. Refrigeration halts secondary fermentation from flavoring.
Tips for Success
- Cleanliness is VERY important. Be sure all utensils, hands and vessels have been thoroughly cleaned and rinsed of soap.
- To dechlorinate water, allow to sit out overnight or boil for 10 minutes then allow to cool.
- Kombucha brews best between 72-85 degrees. If below 70, will ferment slower and you run the risk of the scoby growing mold. (If your scoby looks like it has mold, you must throw it away and start over.) If your environment is below 70, you can use a heating pad to maintain adequate temperature.
- Keep out of direct sunlight.
- Your scoby is a living organism. Do not put it in water above 100 degrees or touch it with dirty hands or hands that have been cleaned with anti-bacteria soap.
- Avoid contact between your brew and metal (except stainless steel). It can affect the taste and will weaken the scoby over time.