Tag Archives: gluten free

Gluten Free Pumpkin Pie Pancakes

Finished pancakes about to be slathered with peanut butter.

Finished pancakes about to be slathered with peanut butter.

I love the Fall because it signals to me that I should start eating pumpkin again.  Now, I love just about any squash but there is something so yummy about pumpkin.  I also really love breakfast.  In fact, I think it is my most favorite meal of the day!  Imagine my delight when I can combine two things I love in one sitting- breakfast and pumpkin?  It doesn’t get much better than that!  That is why I love this recipe for Gluten Free Pumpkin Pancakes.  (I made this recipe with butter and eggs but it is really easy to convert to a vegan recipes by substituting coconut oil for the butter and flax eggs for the chicken eggs.)

These pancakes are amazing because they combine tons of different warming spices like cinnamon, cloves, ginger and nutmeg- perfect to warm and nourish the body on these cold winter days.   These spices signal to me that the holidays are right around the corner!
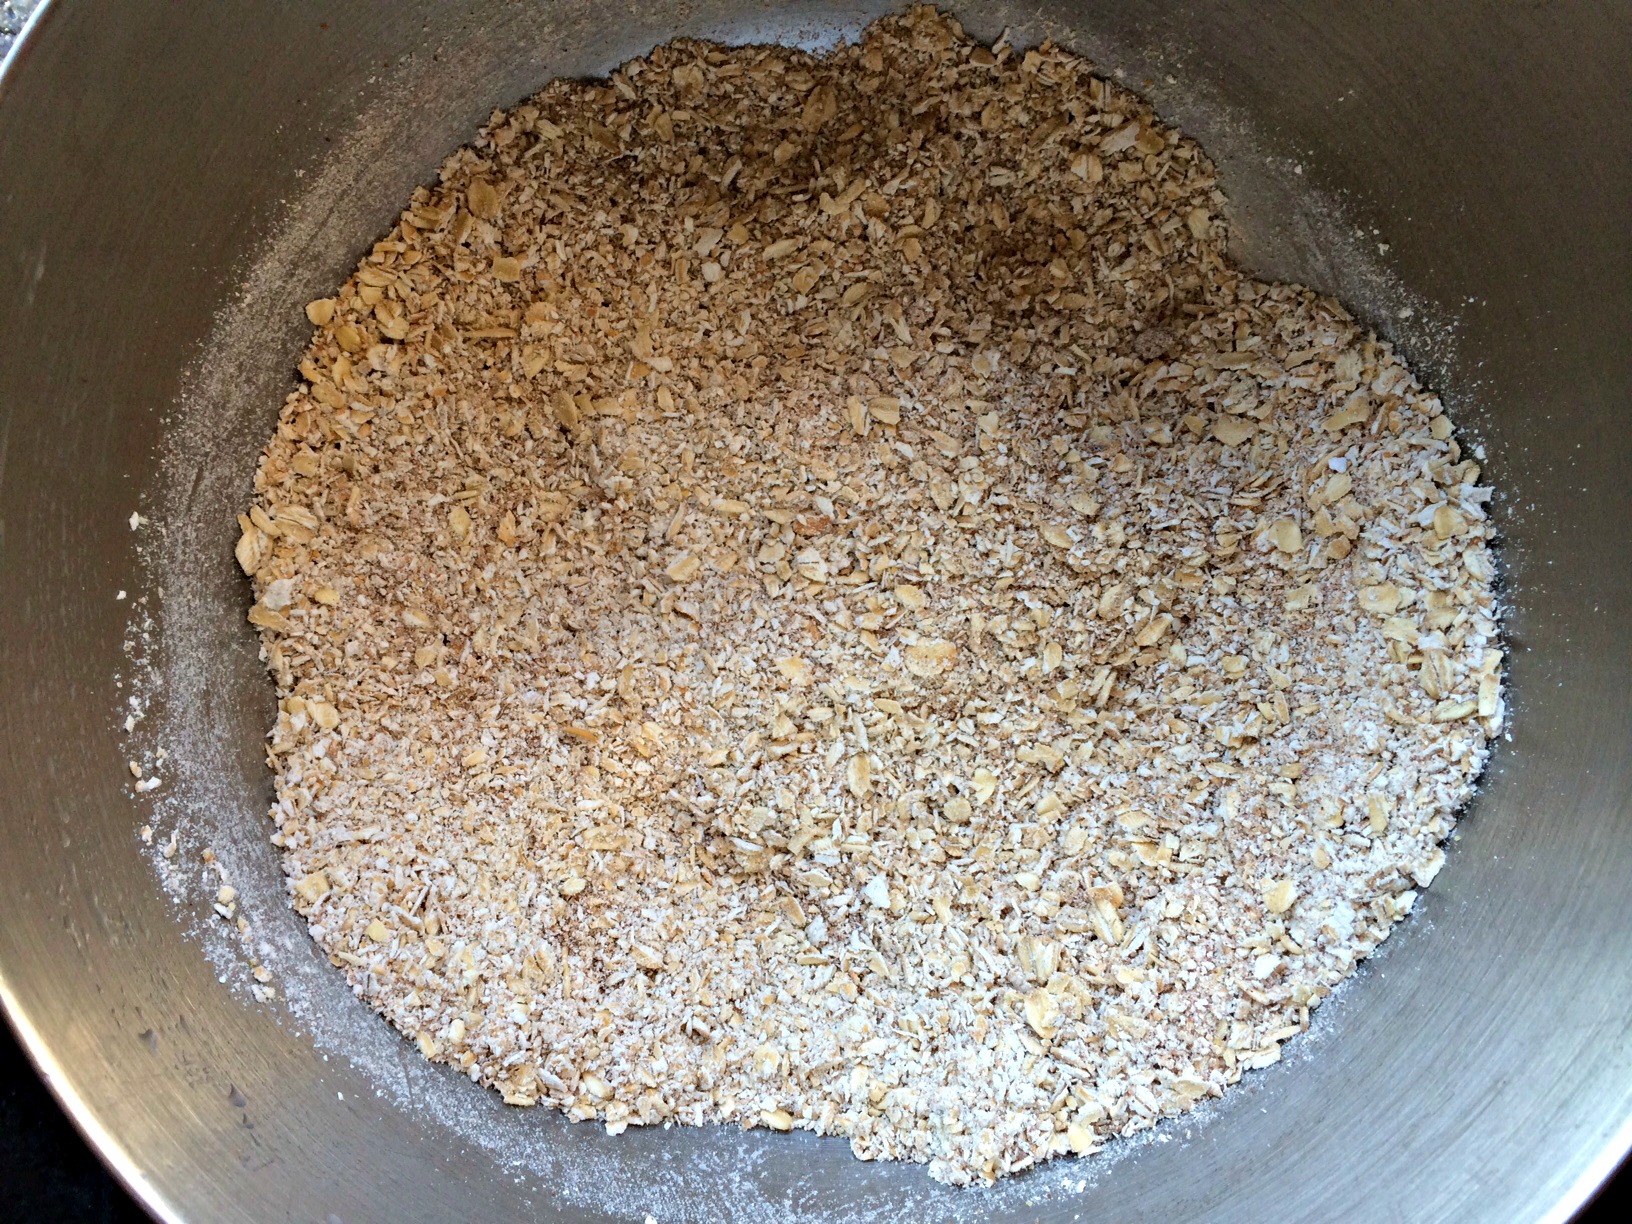
Ground oats.

Ground oats.

I used my food processor to grind my oats to make the oat flour.  As you can see they still had some oat texture to them.  ( I found when I made subsequent batches that my Magic Bullet NutriBullet worked like a dream to produce really fine oat flour.)  You have to decide if you want your pancakes to have more texture to them or if you prefer a more traditional finely ground flour.  Also, if you have someone in your life with gluten issues, be sure your oats say gluten free on the package. Bob’s Red Mill Gluten Free Whole Grain Rolled Oats is an excellent brand.
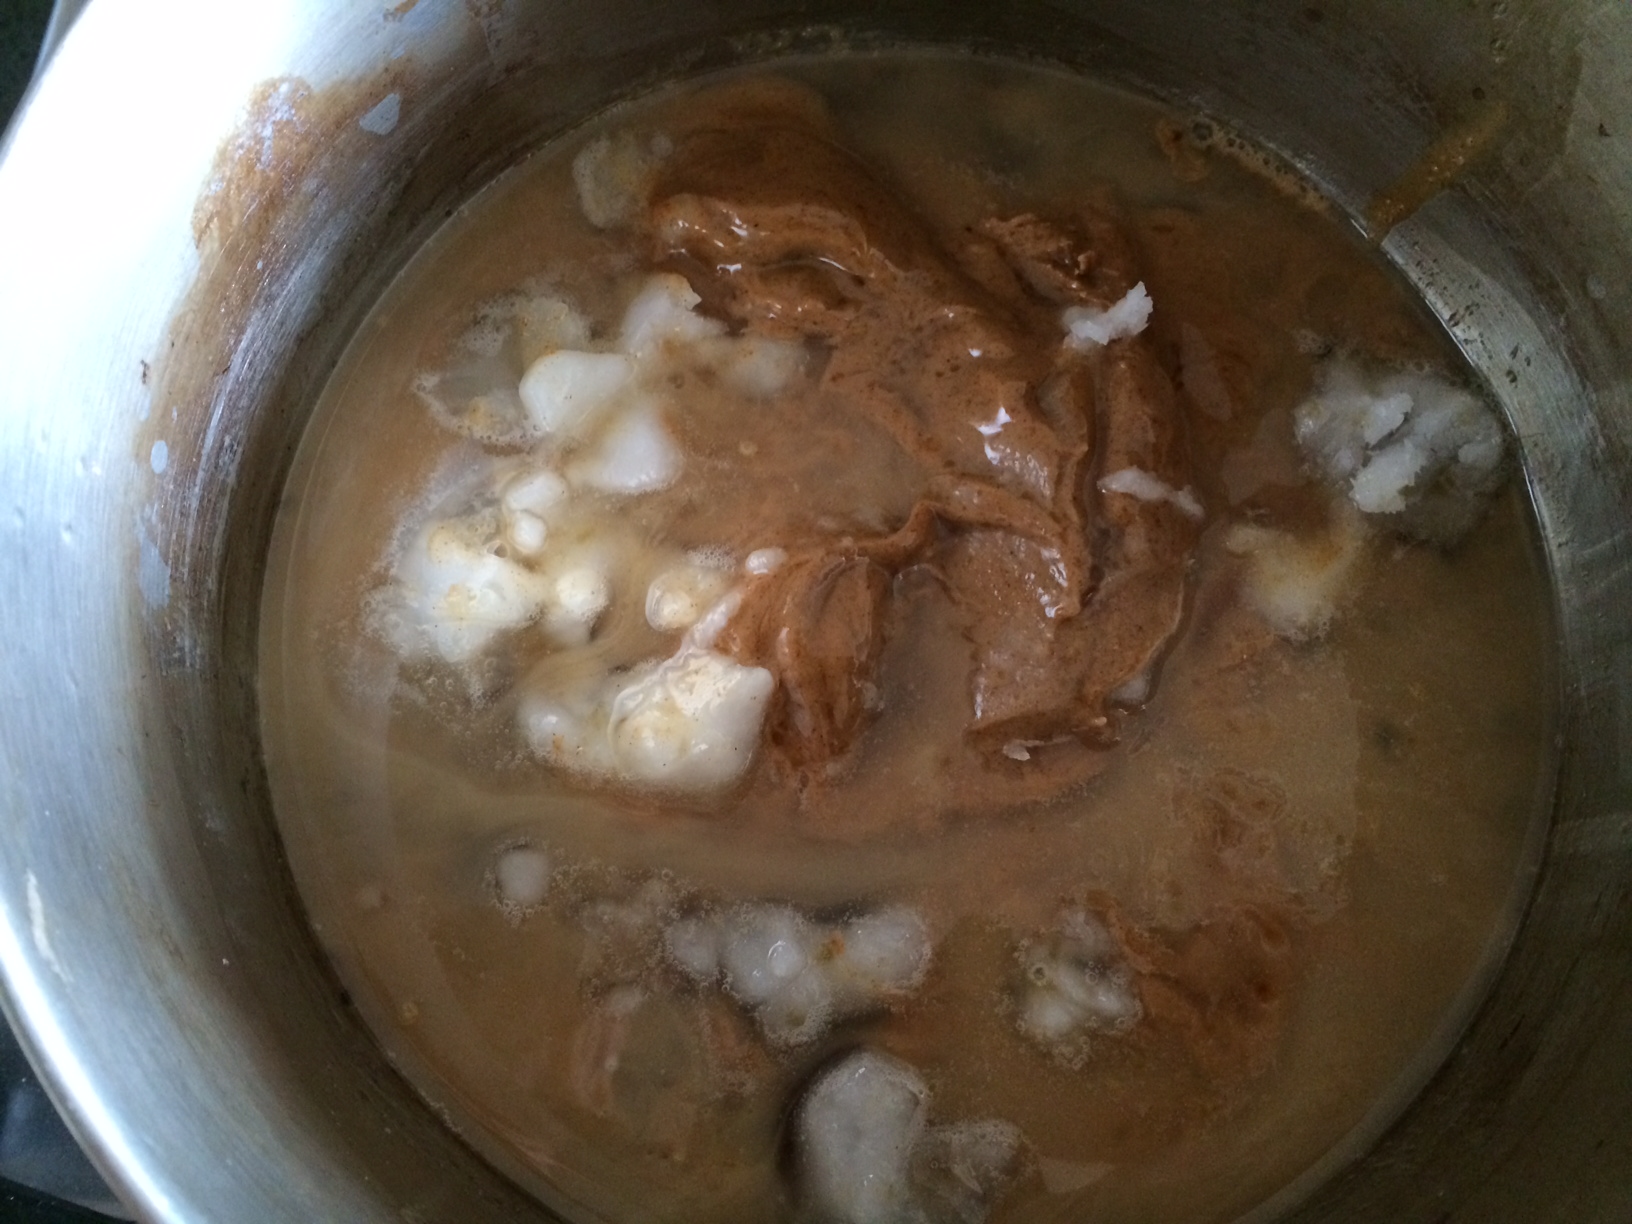
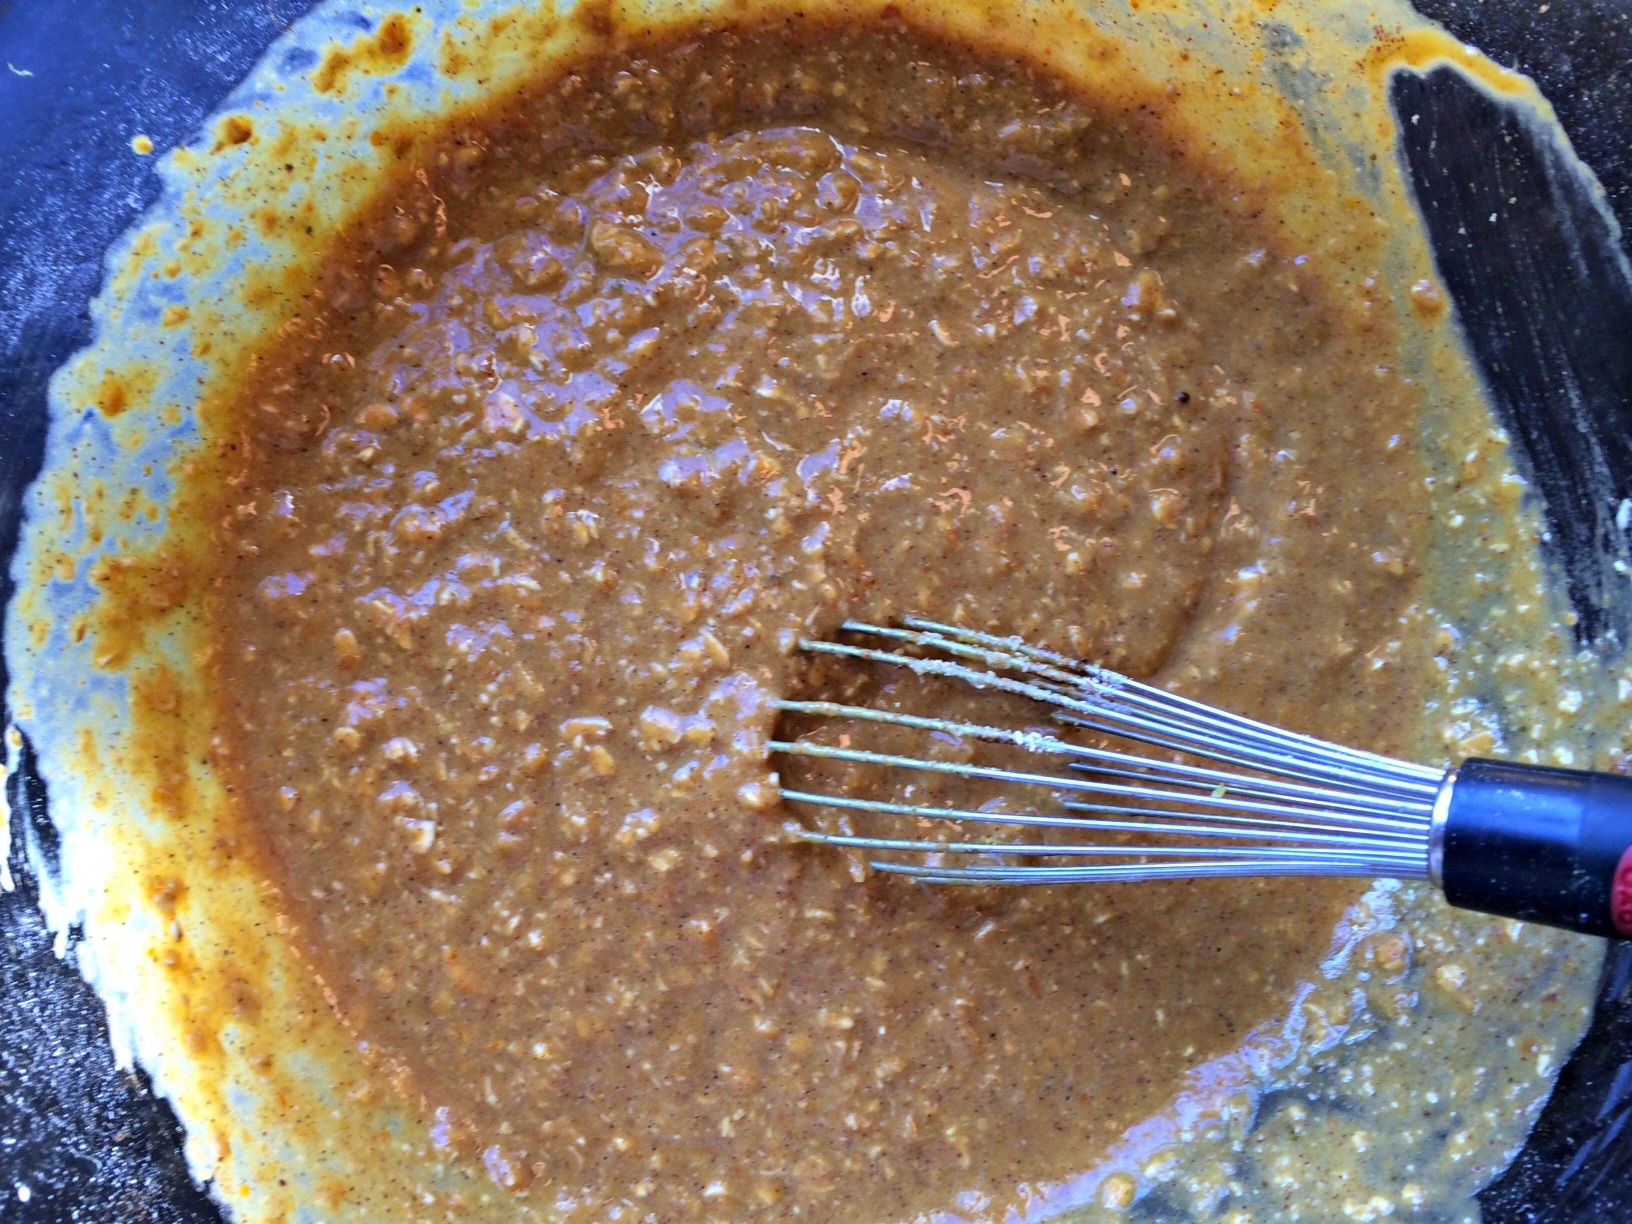
We Ingredients.

Wet Ingredients.

I love the amazingly vibrant color of the wet ingredients in this photo.  You always hear about “Eating the rainbow” to maximize health.  When I  look at this picture, I can just imagine all the healthy beta carotene headed into my body with every bite of pancake!   Extremely high in fiber and low in calories, pumpkin is loaded with disease-fighting nutrients, including potassium, pantothenic acid, magnesium, and vitamins C and E.

Wet and dry ingredients together.

Wet and dry ingredients together.

Pancakes on the griddle.

Pancakes on the griddle.

Gluten Free Pumpkin Pie Pancakes

Ingredients

  • 1 cups of gluten- free oats
  • zest of half lemon
  • 2 tbs of coconut sugar
  • 1/2 tsp of baking soda
  • 1/2 tsp of salt
  • 1 tsp of cinnamon
  • 1 tsp of ginger
  • 1/4 tsp of cloves
  • 1/4 tsp of nutmeg
  • 1 tbs of flax seed ground
  • 1/2 cup of pumpkin puree (not pumpkin pie mix)
  • 1/2 cup of milk (I used almond)
  • 2 tbs of butter or coconut oil
  • 2 eggs (could use flax eggs)

Instructions

  1. Place oats in food processor or NutriBullet to grind to flour.
  2. Mix all dry ingredients together.
  3. In seperate bowl, mix all wet ingredients including pumpkin.
  4. Add wet ingredients to dry ingredients.
  5. Stir well.
  6. Cook pancakes on well greased griddle or in a pan. Flipping only after first side is well browned.
  7. These are dense, thick pancakes so they take a little while to cook.
  8. Serve with maple syrup. (In my house, we add a generous dose of nut butter too!)
  9. Enjoy!
http://www.nourishedrootspdx.com/blog/gluten-free-pumpkin-pie-pancakes/

This recipe adapted from Cookie and Kate.

This post contains affiliate links.

Dark Chocolate Nut and Seed Bombs

Dark Chocolate Nut and Seed Blasts- Good for your Heart!

Dark Chocolate Nut and Seed Blasts- Good for your Heart!

I have been so intrigued by all the raw truffle recipes on Pinterest.  Every time I see a recipe for truffles or energy balls, I have to click over to the actual website to see how they are made.  I can’t believe how many different versions there are!  After reading so many recipes and dreaming about how yummy they all sounded,  I decided to try to make some of my own.

Since I am always looking for ways to get more nutrition into my kids, I wanted to be sure my nut and seed bombs offered some health benefits.  Given how each nut and seed has it’s own distinct nutritional benefits, I decide to try to incorporate as many different types of nuts as possible.  I used walnuts for their short chain omega-3 alpha linolenic acid to benefit the heart and give copper and manganese.  I include pistachios for their high fiber content and carotenoids.  Almond butter was used for almond’s high vitamin E, manganese, copper and fiber content.  Finally, hemp seeds were included for another dose of omega-3’s

Chopped walnuts for healthy omega-3's.

Chopped walnuts for healthy omega-3’s.

After grinding up the dates, nuts and seeds, I added the melted dark chocolate.  The dough turned a beautiful, rich brown color and tasted so yummy!

Dough all ground up before heading to fridge.

Dough all ground up before heading to fridge.

I found the balls rolled the easiest by squishing them into loose balls and then rolling them in the chopped pistachios.  After they were lightly covered with pistachios, I would roll them into tighter balls.  (Unfortunately, my ball rolling skills aren’t perfect- the balls are a little lopsided but they still taste delicious!)  It also seemed best to VERY finely chop the pistachios.  They adhered the best when finely chopped!

Blasts all ready to eat.

Blasts all ready to eat.

Dark Chocolate Nut and Seed Bombs

Ingredients

  • 20 dates ground into a paste
  • 1/3 cup of almond butter
  • 1/3 cup of hemp seeds
  • 1 3.5 oz dark (70% or above) chocolate bar, melted
  • 1 tsp vanilla almond milk
  • 1/2 tsp sea salt
  • 1/2 tsp cinnamon
  • 1/2 tsp of cardamon
  • 1/2 cup raw walnuts
  • 1/4 cup of pistachios, finely chopped

Instructions

  1. Grind pitted dates in a food processor fit with an s-blade until a paste forms.
  2. Place chocolate in a double boiler over low heat, stirring occasionally until melted.
  3. Add walnuts and pulse until combined.
  4. Add hemp seed, almond milk, cinnamon, cardamon and sea salt. Pulse until well combined.
  5. Add in melted chocolate and pulse until well mixed with the nuts and dates. You may have to stop and scrape the sides a couple of times.
  6. Place food processor bowl in the fridge for about 20 minutes.
  7. Take nut mixture out of fridge and carefully roll the dough into balls.
  8. The balls can be rolled in chopped pistachios or other nuts according to your tastes.
  9. (I found it was easier to lightly squeeze the dough into balls and then roll them in the pistachios and then roll them some more to make the balls stay together.)
  10. Enjoy!
http://www.nourishedrootspdx.com/blog/dark-chocolate-nut-and-seed-bombs/
.

A single blast of nutty goodness.

A single blast of nutty goodness.

I love the bright green of the pistachios contrasted with the brown of the chocolate!  It is so pretty!

A whole bowl of nutty goodness.

A whole bowl of nutty goodness.

Feel free to substitute different nuts or nut butters for any of the ingredients.  I think you can never go wrong with a nut.  Enjoy!

Shared with Rock My Vegan Socks, Girl Meets Nourishment, Today’s Creative Blog, The Novice Gardner and Real Food Fridays.

Lime and Chocolate Cashew Cream Cheesecakes

Lime, raw, vegan cheesecake with raspberry sauce.

Lime, raw, vegan cheesecake with raspberry sauce.

For the Fourth of July, we were headed up to the Olympic Peninsula to spend time with my in-laws.  They live in a somewhat rural area on the Puget Sound.  Everyone in the family loves to go up there because not only do we get to spend time with the grandparents but the area is filled with great outdoor activities.  Our days are consumed with fishing, kayaking, crabbing, hiking, biking and walking on the beach.  The other thing I love about going up there is all the yummy natural food.  There are multiple small farmer’s markets within 20 minute of their house.  The Sound is filled with fish and crab and the forest has wild blackberries and huckleberries.  I love to take advantage of the natural bounty!  Usually, when I am there in the summer, I end up making some sort of berry cobbler for my father-in-law’s birthday.  Crazily enough, he is one of the few people I know who doesn’t like chocolate so I like to try find desserts that will make him happy.

Before going up there last week, I was cruising around the internet and came upon the beautiful blog, Healthy For Happy.  Lisa, the blog’s author, had posted a recipe for a yummy sounding raw, lime, vegan cheesecake.  I had made a raw key lime pie before using the recipe from the I Am Grateful: Recipes and Lifestyle of Cafe Gratitude cookbook.  It was super tasty, particularly the crust.  I decided to combine the two recipes to make my own raw vegan cheesecake.  (I also knew that most of the people at my in-laws DID like chocolate, so I decided to make half mini lime cheesecakes and half mini chocolate cheesecakes.)


Chocolate, raw, vegan cheesecake with raspberry sauce.

Chocolate, raw, vegan cheesecake with raspberry sauce.

Lime and Chocolate Cashew Cream Cheesecakes

Ingredients

  • FOR CRUST:
  • 11/4 cup of macadamia nuts
  • 11/4 cup of pecans
  • 1/4 cup of packed dates
  • 1/4 tsp vanilla
  • 1/8 tsp of salt
  • FOR FILLING:
  • 2 cups cashews soaked overnight (or at least 4 hours) and then rinsed and drained
  • 1 tsp vanilla
  • 1/3 cup of maple syrup
  • 1/3 cup of melted coconut oil
  • small amount of almond milk as needed
  • Juice of 1-2 limes depending on how juicy they are
  • zest of 1 lime
  • 1 tbs of cacao powder
  • couple of squares of dark chocolate, melted

Instructions

  1. To make the crust, put all crust nut ingredients in a high speed blender or food processor.
  2. Process until nuts are small and crumbly.
  3. Slowly add dates while continuing to process nut mixture.
  4. Crust will begin to stick together.
  5. Press crust mixture into muffin tins lined with paper liners.
  6. The crust should hold together well in bottom of tins.
  7. I made two different types of cheese cake so I had to divide all the filling ingredients in 1/2. If you are only going to make one type, you can pour all the ingredients into the blender at the same time.
  8. To make the filling, add 1/2 the cashews, 1/2 the vanilla, 1/2 the maple syrup, juice from 1 lime, lime zest and 1/2 the coconut oil to a blender.
  9. Blend until smooth.
  10. Taste to see if it is limey enough.
  11. If not, gradually add more juice until it tastes as limey as you want.
  12. Once the filling tastes as limey as you like, add lime filling to half of the prepared muffin tins.
  13. Clean out the blender.
  14. Add other half of the ingredients, plus the cacao and melted dark chocolate to the blender.
  15. Process until smooth.
  16. If not getting creamy, you can add small amounts of almond milk to help your blender process the nuts.
  17. Taste to see if chocolaty enough. If not add more cacao to the blender.
  18. Once all the nuts are ground up, spoon filling into the prepared muffin tins.
  19. Smooth top of the cheesecakes.
  20. Place in the fridge for a few hours to firm up and then ENJOY!
  21. You can serve them with a raspberry sauce if you like. Recipe to follow.
http://www.nourishedrootspdx.com/blog/lime-and-chocolate-cashew-cream-cheesecakes/

Here is a picture of all the nuts for the crust before they get chopped up.

Pecans and macadamias before they become crust.

Pecans and macadamias before they become crust.

Below is a pic of the nuts, processed into the crust mixture and then pressed into the cup cake pan.  They are just waiting for the filling to be ready.

Crust before filling.

Crust before filling.

A pic of the muffin tin with the chocolate and lime fillings added.  Everything is now ready to go into the fridge.

Chocolate and lime raw vegan cheesecakes.

Chocolate and lime raw vegan cheesecakes.

I have a crazy amount of raspberry bushes in my yard and last week the were filled with berries.  I decided to use some of the berries to make a raspberry sauce to go on the cheesecakes.  The cheesecakes are super yummy without the sauce but if you want to add a little extra zing, this is one way to do it.

Raspberry on the vine in my yard.

Raspberry on the vine in my yard.

Homemade Raspberry Sauce

Ingredients

  • 2 cups of fresh raspberries (I am sure frozen would work too)
  • 1/4 cup of agave syrup
  • juice from 1 lemon
  • zest of 1 lemon

Instructions

  1. Put all ingredients in a pot on the stove over low heat.
  2. Stir frequently to prevent burning or sticking.
  3. When raspberries are broken down and the sauce starts to thicken, turn off stove.
  4. Allow to cool.
  5. Put in glass jar and store in the fridge.
http://www.nourishedrootspdx.com/blog/lime-and-chocolate-cashew-cream-cheesecakes/

Enjoy!

Shared on the Plant Based Pot Luck Party, Live Laugh Rowe, A Glimpse Inside, Real Food Fridays, Gluten Free Homemaker and the Nourishing Gourmet.

Chocolate Almond Butter Frosted Cookies

All yummy and ready to eat.

All yummy and ready to eat.

This is one of those stories of a very trying day in the kitchen.  You know, one of those days were nothing seems to go exactly as you plan.  I originally intended to make some chocolate peanut butter flower sandwiches like I saw on Gluten Free Homemaker but they were too ugly to share.  I attempted to tweak the recipe from Gluten Free Homemaker but the coconut oil I used made the chocolate flowers start to melt as soon as you touched them.  They tasted super yummy but looked like a disaster.

After melting and pouring two whole bars of delicious dark chocolate.

Dark chocolate and coconut oil.

Dark chocolate and coconut oil.

And then cutting out all these flowers.

Flower cut outs.

Flower cut outs.

All I got were these few, lousy but super tasty Dark Chocolate Almond Butter Flower Cups-BUMMER! (Oh and I had  lots of left over chocolate scraps to melt down again to put on strawberries for Easter Sunday brunch.)

Flower cups

Flower cups

Unfortunately, it was hard to keep the chocolate from melting any time you worked with it and as you can see from the picture above, it showed every possible fingerprint.  The boys sure liked the mess ups but I still had a bowl full of the almond butter .filling.  When I tasted it, I thought it would be great as a frosting on a chocolate cookie so I began searching for recipes.

I found a great option on the blog Chocolate Cover Katie.  However, the cookie part of this recipe also proved to give me some challenges.

Dough all mixed up and ready to go in the fridge.

Dough all mixed up and ready to go in the fridge.

Originally, I was going to roll out the dough and cut the cookies out into perfect circles.  However, as soon as I tried to pick up the cookies and move them to the baking sheet,their shapes got a little funky.


Sticky dough all rolled out.

Sticky dough all rolled out.

I decided it would be easier to transfer the cookies that moved easily to the baking sheet without changing shape too much and to take the remaining dough and scoop out clumps which I then smushed with the back of a fork.  I figured it wouldn’t matter too much how pretty they were because they would be covered with almond butter frosting.

Cookies ready to go in the oven.

Cookies ready to go in the oven.

I was right!  Even though these cookies didn’t look to pretty, they sure tasted good.

Finished cookies ready to be devoured.

Finished cookies ready to be devoured.


Chocolate Almond Butter Frosted Cookies

Ingredients

  • Cookie
  • 3/4 cup Gluten free flour
  • 1/4 cup plus 2 tbsp cocoa powder
  • 1/4 cup plus 2 tbsp coconut sugar
  • 1/4 tsp salt
  • 1/4 tsp baking soda
  • 1 tsp pure vanilla extract
  • 1/4 cup coconut oil melted
  • 3 tbsp milk of choice (I used almond)
  • 2 tbsp pure maple syrup (or agave)
  • Frosting
  • 3/4 cup of almond butter
  • 2 tbs of honey
  • 2 tbs of powdered sugar
  • 1 tsp of vanilla

Instructions

  1. Mix all the dry ingredients for the cookie into a bowl.
  2. Combine wet ingredients in a different bowl.
  3. Combine both bowls until well mixed.
  4. Refrigerate for 30 minutes.
  5. While cookie dough in the fridge, combine all ingredients for the frosting.
  6. Scoop out about 1 tbs of dough for each cookie.
  7. Place on baking pan.
  8. Flatten with a fork.
  9. Bake at 300 for about 13 minutes.
  10. Allow to cool for at least 10 minutes.
  11. Frost with almond butter frosting.
  12. Enjoy.
http://www.nourishedrootspdx.com/blog/chocolate-almond-butter-frosted-cookies/

What cooking disasters have you had that you salvage into a tasty treat?

This post was shared on The Idea Room, Skip to My Lou, Gluten Free Homemaker,  Natural Living Mamma,  Homespun Oasis and Food Renegade.

Jane’s Chocolaty Gluten Free Granola

photo 3 (5) I have been in a bit of a breakfast slump lately.  My normal rotation of chia pudding, warming grain cereal with coconut yogurt and fried egg sandwiches with avocado and hot sauce on sprouted bread is getting a little repetitive.  As I was pondering what new addition I could make to my routine, I remembered an old recipe my friend, Jane, gave me for a super yummy, chocolaty gluten free granola. When I pulled the recipe out of my recipe box, it was covered in peanut butter smears and coconut oil stains- signs of a well used recipe.  I remembered this granola not hanging around long in my household which confirmed I should reintroduce it to my family.  I was excited to have this back as an option for my breakfast routine (or snack or dinner or any other time I had a hankering for chocolaty goodness!).  As I looked at the recipe, I realized there were a few items I wanted to tweak from the original recipe based on the family’s changing eating habits but for the most part I left it as is.  (I also changed a few ingredients based on the

types of dried fruit and nuts I had in my house.)

Dry ingredients all combined.

Dry ingredients all combined.


Nut butter, syrup, agave and coconut oil starting to melt.

Nut butter, syrup, agave and coconut oil starting to melt.


Melted wet ingredients.

Melted wet ingredients.

I used a combination of maple syrup and agave for my sweeteners but you could substitute honey or brown rice syrup if those are more to your liking.  When you mix in the warm, wet ingredients, your chocolate chips will melt, spreading chocolate throughout the whole mixture.  I like it this way because then I get a hint of chocolate in every bite.  However, if you like granola with solid chunks of chocolate, I would wait to add the chips after the wet and dry ingredients have cooled a little bit.

Wet and dry ingredients all combined.

Wet and dry ingredients all combined.

As you can see from the photo above, everything is lightly coated but not soaked.

Granola ready to go into the oven.

Granola ready to go into the oven.

The recipe calls for only 30 minutes in the oven but mine took much longer (almost 50 minutes).  (My oven runs a little cold so be sure to base your cook time on your own oven.)

Yum!  A whole container of granola!

Yum! A whole container of granola!

Chocolaty Gluten Free Granola

Ingredients

  • 3 cups gluten free oats
  • 1/3 cup of amaranth, soaked (This is optional. I had it so I added it for a protein boost.)
  • 1/4 cup flax seeds (1/2 of them ground, 1/2 of them whole)
  • 1/4 cup of sunflower seeds
  • 1/4 cup of coconut
  • 1/4 cup of dried blueberries
  • 1/4 cup of dried cherries
  • 1/4 cup of chocolate chips (vegan or regular)
  • 1/4 cup of chopped walnuts (Any nuts will do. Go with what you have available or what you like.)
  • 1/4 cup of chopped pecans
  • 1/2 cup of almond butter (Any nut butter will work in this recipe.)
  • 1/4 cup of agave
  • 1/4 cup of maple syrup
  • 1/2 tsp of vanilla
  • 5 tbs of coconut oil

Instructions

  1. If using amaranth, soak for at least six hours and overnight if possible.
  2. Preheat oven to 300 degrees.
  3. Combine all the dry ingredients in a large bowl.
  4. In a sauce pan, over low heat, combine almond butter, vanilla, agave, maple syrup and coconut oil.
  5. Stir until well combined.
  6. Add wet ingredients to dry ingredients.
  7. Stir until all dry ingredients covered with almond butter mixture.
  8. Press into a pan.
  9. Place in oven for at least 30 minutes. Stir every 10 minutes. (Mine took over 50 minutes to be fully cooked but you will have to keep checking for when it looks done to you.)
http://www.nourishedrootspdx.com/blog/janes-chocolaty-gluten-free-granola/

Enjoy!

Enjoy!

This post is part of a Friday Link party of Nap time Creations,  Today’s Creative Blog, Live Laugh RoweGluten Free Homemaker, The Nourishing Gourmet and The Shabby Nest.

This post

Dark Chocolate Cherry Snack Bars

Finished Bars.

Finished Bars.


In our house, I am always looking for the easy grab and go snack for my active family.  As I have moved through this journey towards healthier eating for me and my family, I have been appalled at some of the ingredients listed on food boxes- especially foods marketed towards kids.  My kids love their snack bars so I like to try to develop recipes that appeal to their desire for a bar but without all the extra “special” ingredients of commercial bars.  With these Dark Chocolate Cherry Snack Bars, I think I have scored a winner.

They are crunchy, chewy, chocolaty, nutty mounds of goodness with tons of healthy omega-3’s, protein and other vitamins and minerals.  And best of all they have no “mystery” ingredients that you need a science degree to pronounce!

Chopped and roasted pistachios.

Chopped and roasted pistachios.

In this bar, I have used both quinoa, a seed most people are familiar with and millet, a grain most people aren’t familiar with eating.  (Even though people in Europe have been eating it for centuries, most Americans will only recognize it as one of the ingredients in bird seed.)  I like to add millet to baked goods because it is a gluten free, high protein, high fiber grain that adds a little crunch to whatever I am whipping up.  Millet is high in amino acids, B-complex vitamins including niacin, folate, thiamine, and riboflavin, and is high in iron, magnesium, phosphorus, manganese, and potassium. It also is a good source of calcium and zinc.  However, if the thought of eating “bird food” makes you squeamish or can’t find millet, you can  replace it with quinoa or another of your favorite grains.

Oat mixture before the almond butter.

Oat mixture before the almond butter.


Oat mixture combined with the almond butter mixture.

Oat mixture combined with the almond butter mixture.

Dark Chocolate Cherry Snack Bars

Ingredients

  • 1 cup soaked uncooked old fashion oats
  • 1/4 cup soaked uncooked quinoa
  • 1/4 cup soaked uncooked cup of millet
  • 3/4 cup unsweetened dried cherries
  • 1/2 cup of salted dry roasted pistachios, chopped
  • 1/4 cup of unsweetened coconut
  • 1/4 cup of hemp seeds
  • 2 tablespoons of ground flax seeds
  • 1 ounce of dark chocolate, chopped
  • 1/2 cup of almond butter, smooth
  • 6 tablespoons of maple syrup
  • 1 tablespoon of coconut oil
  • 1/2 teaspoon of salt

Instructions

  1. Soak oats, quinoa and millet for at least 6 hours but preferably overnight- (if you are going to soak).
  2. Preheat oven to 350 degrees.
  3. Drain oats, quinoa and millet and then spread on a baking sheet.
  4. Bake at least 10 minutes but until lightly brown. Stir to break up any clumps that form.
  5. Let cool.
  6. Place oat mixture in a large bowl and add the coconut, cherries, pistachios, flax meal, chocolate and hemp seeds.
  7. Combine the almond butter, coconut oil and maple syrup in a pot.
  8. Bring to a boil. Stirring constantly.
  9. Pour almond mixture over the oat mixture. Stir to combine.
  10. Press mixture into an 8x8 pan greased with coconut oil.
  11. Bake for 13 minutes or until lightly brown.
http://www.nourishedrootspdx.com/blog/dark-chocolate-cherry-snack-bars/

Finished product. Yum! Yum!

Finished product. Yum! Yum!

This post is part of a link-up party on Tip Junkie.

Seven Seed Bars

Photo by Naomii on flickr.

Photo by Naomii on flickr.

One of the major bonuses of being in a Wholistic Nutrition program is having other students and teachers cook for you.  We have shared some seriously tasty meals in the year we have been in school.  In one of our beginning classes, the Wellspring teachers brought a snack bar that has become a stable in our house.  This bar is something I can cook up in a short amount of time and know the boys are getting some good, healthy nutrition in a grab and go package.  These bars do not hang around very long in our house.

Measured quinoa.

Measured quinoa.


Roasting macadamias and quinoa.

Roasting macadamias and quinoa.


Stirring up some seeded goodness!

Stirring up some seeded goodness!


Seven seed bars ready for consumption.

photo 3 (20)


Seven Seed Bars

Ingredients

  • ½c quinoa toasted
  • 1 ½c almond butter
  • ½c maple syrup (I don't like mine really sweet, so I often short my 1/2 cup a little.)
  • ½c brown rice syrup or agave (I will also short this a little too.)
  • ¼tsp cardamom
  • ¼tsp cinnamon
  • ½c sunflower seeds toasted
  • ¾c pumpkin seeds toasted
  • ¼c hulled hemp seeds
  • ½c macadamia nuts toasted & chopped
  • ¼c cacao nibs (sometimes I leave these out, depending on if I have them or not)

Instructions

  1. Toast nuts and quinoa in 350 degree oven or on the stove top in a heavy pan.
  2. Raise oven temperature to 350 degrees.
  3. Mix almond butter, syrups and spices.
  4. Add all seeds.
  5. Mix well.
  6. Oil a 9x13 pan and spread batter evenly.
  7. Bake 15 minutes til golden brown.
  8. Cool before slicing.
  9. Stores well in the fridge for about a week but only if they don't all get eaten in the first hour.
http://www.nourishedrootspdx.com/blog/seven-seed-bars/

As you can see, these are an amazingly dense bar, packed with nutty nutrition.  These bars offer a high amount of protein in a small package.  Quinoa is a gluten free seed which is an excellent source of vegetarian protein.  It contains eight essential amino acids our body needs to thrive.  One cup has 5 grams of fiber and is an excellent source of manganese, potassium, copper, B6, phosphorous and thiamine.

Almonds have been recommended for years as a quick source of healthy protein.  They contain two essential brain nutrients, the amino acid, l-carnitine and riboflavin.  Both nutrients have been shown to increase brain activity.  Almonds help raise the HDL cholesterol, “good”  cholesterol, and lower the LDL (bad cholesterol) in the body.  They also contain high levels of phosphorous with helps build strong bones and teeth.

Depending on the other nuts or seeds you choose to use in this recipe, you can create a nutritional powerhouse for your own family based on the flavors and textures they enjoy.

This post shared with Gluten Free Homemaker.


Related Posts Plugin for WordPress, Blogger...